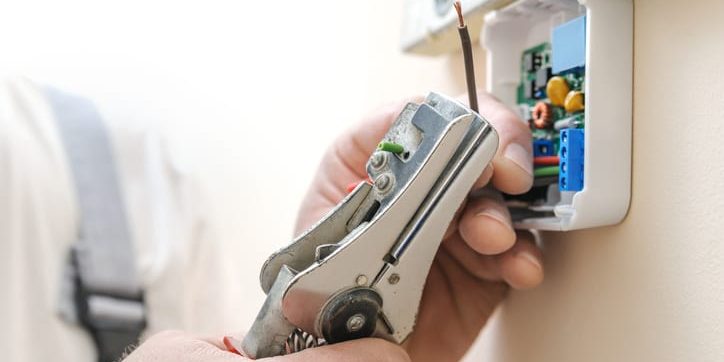
So, you bought a new thermostat and are wondering if you can install it yourself? For some, thermostat wiring is a DIY job, but we won’t blame you if you opt for a local pro to handle the work.
We’ll give you all the information you need to successfully install your new thermostat!
Before you get started, make sure you have all the tools you need to complete the task. To install a thermostat, you’ll require:
- Level
- Screwdriver
- Wire stripper
- Drill (optional)
If your new thermostat is a different shape and size than your existing one, you may also need spackle to patch holes and paint to match your current wall color. If you don’t have any leftover wall paint, have your wall color matched at the paint store before you begin.
Keep your cell phone nearby. Its camera will come in handy once you get started.
How to install a thermostat
- Turn the power off
Go to your breaker box and switch off the power to your HVAC system, including the thermostat.
- Remove the existing thermostat
Detach the cover by gently pulling it away from the base. If it doesn’t come off easily, check if there’s a screw or latch to release it.
You will see several colorful wires inserted into terminals. Use your phone to photograph the thermostat wiring. Doing so will help you remember which wire goes in which terminal. Alternatively, some new thermostats come with stickers to label the wires.
Once you’ve recorded your thermostat wiring, disconnect each wire from its terminal. You’ll likely need to loosen each terminal screw to free the wiring. Next, remove the screws holding the thermostat base to the wall.
Carefully take the thermostat base off the wall. Hold the wires securely while doing this, so they don’t slip into the wall.
If your thermostat is more than 20 years old, it may contain mercury. Don’t just throw it away. Follow the mercury disposal guidelines for your area.
- Find the common wire
The common wire is also known as the C-wire because it connects to the C terminal of the thermostat. It’s generally blue, but it may also be brown, black, or purple.
The common wire is necessary for modern thermostats – especially smart and programmable thermostats. Your old thermostat might not have used the common wire.
If you don’t see the common wire, look inside the hole where the other thermostat wiring is coming out. Carefully pull out any wires you find tucked inside the wall.
If you still can’t find it, contact an HVAC technician for help. Or choose a thermostat model that doesn’t require one.
- Repair the wall
Now is the perfect time to fix your wall. Ensure the thermostat wiring is secure by taping or clamping the wires together – you don’t want them to slide back into the wall.
Fill any holes your old thermostat left behind with spackle. Touch up the wall with your current paint color.
Leave the hole with the thermostat wires open. Wait for the spackle and paint to dry before moving on to the next step.
- Install your new thermostat
Place your new thermostat’s backplate on the wall. Make sure it’s level, and screw it into place. If it requires drywall anchors, use a drill to make your holes in advance.
Using a wire stripper, ensure about ⅜-inch of the wire is exposed. Then insert each wire into the corresponding terminal, referring to the photo you took or the labels you placed earlier.
Once you insert the wires, tighten the terminal screws. Attach the thermostat’s faceplate.
- Turn the power on and complete the installation
Turn the power back on at your breaker box.
Complete the installation instructions for your specific thermostat model. For smart thermostat installation, that will likely include connecting to your home WiFi network.
Programming the thermostat is the final step. You’ll need some technical understanding to complete this portion, and we recommend following your installation manual step-by-step. If the programming isn’t completed successfully, your system won’t operate optimally.
If your thermostat controls both your heating and cooling systems (e.g., your air conditioner and furnace), you will have two red wires. The Rc terminal connects to the cooling system, and the Rh terminal connects to the heating system.
Depending on your unique HVAC system, you might not have all of these wires.
Installing a thermostat is a DIY job that requires some basic knowledge and tools. If wires aren’t how you prefer to spend a Saturday afternoon (and we certainly don’t blame you), hire an HVAC professional to handle your thermostat installation.


